

I did a bit of research before I sat down in front of AutoCad to draw my dust boot and I think it paid off for version 1 and version 2. I made them out of MDF since it was handy and is inexpensive to throw out and start again, the bad thing about MDF is that its essentially made of paper products and when/if it gets wet falls apart.
Anyway I wanted to see if the design would work and if I could manufacture it, the hard part in making this part is that it has to be flipped to mill on both sides and requires locating pins.
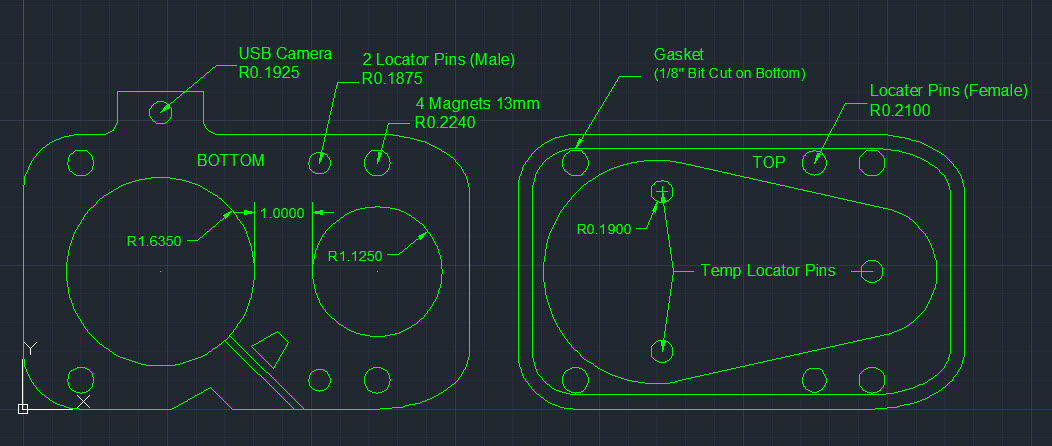
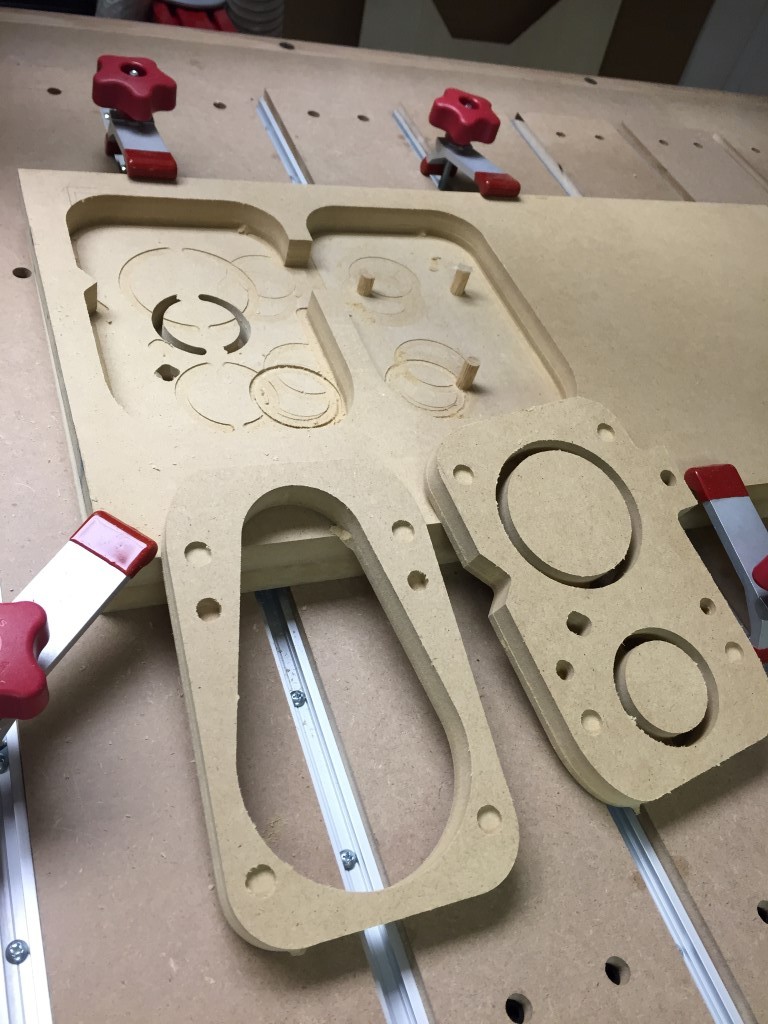
For this job I needed a spoiler board so that I could machine into the table for the locating pins. I used wooden dowels for the locator pins and it seemed to work rather well. I wouldn’t want to do a production run like this but for a one off it worked OK.
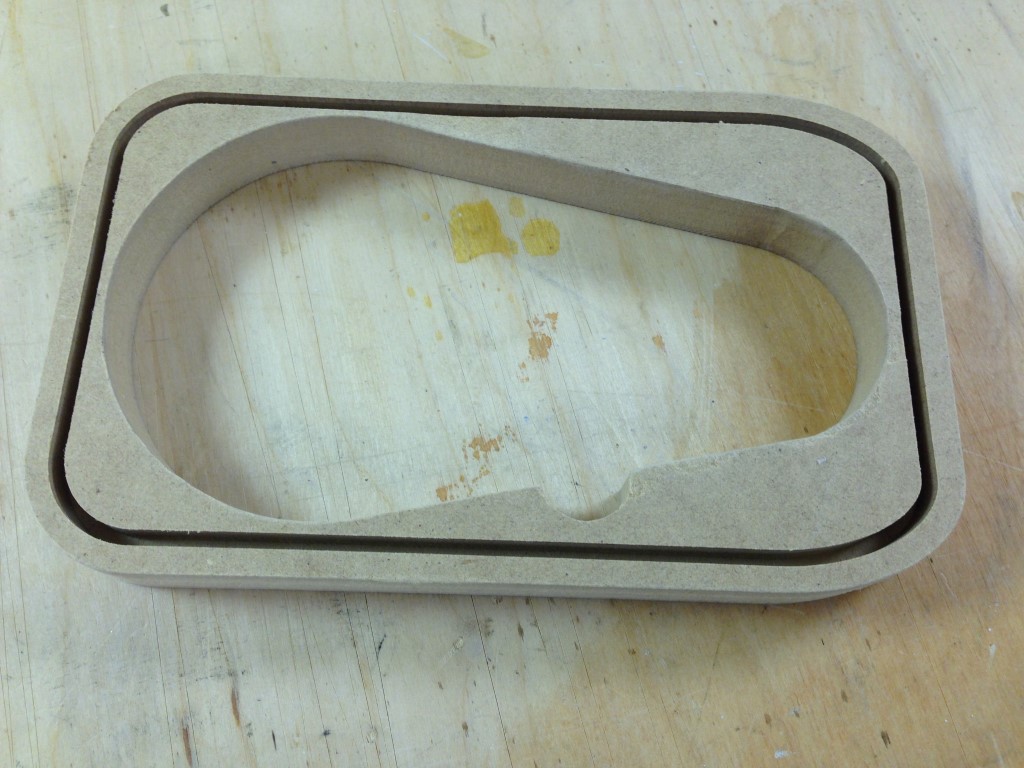
Now when looking at these pics make note they are a mixed bag from version1 and version2 but the manufacture process and assembly are he same.

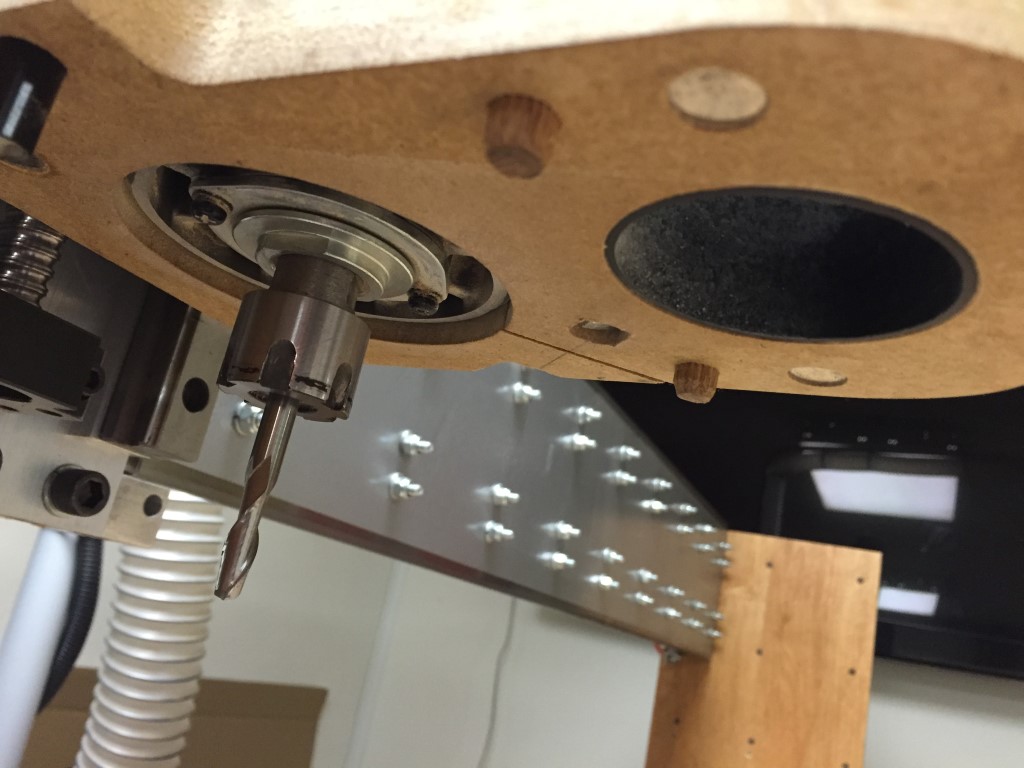
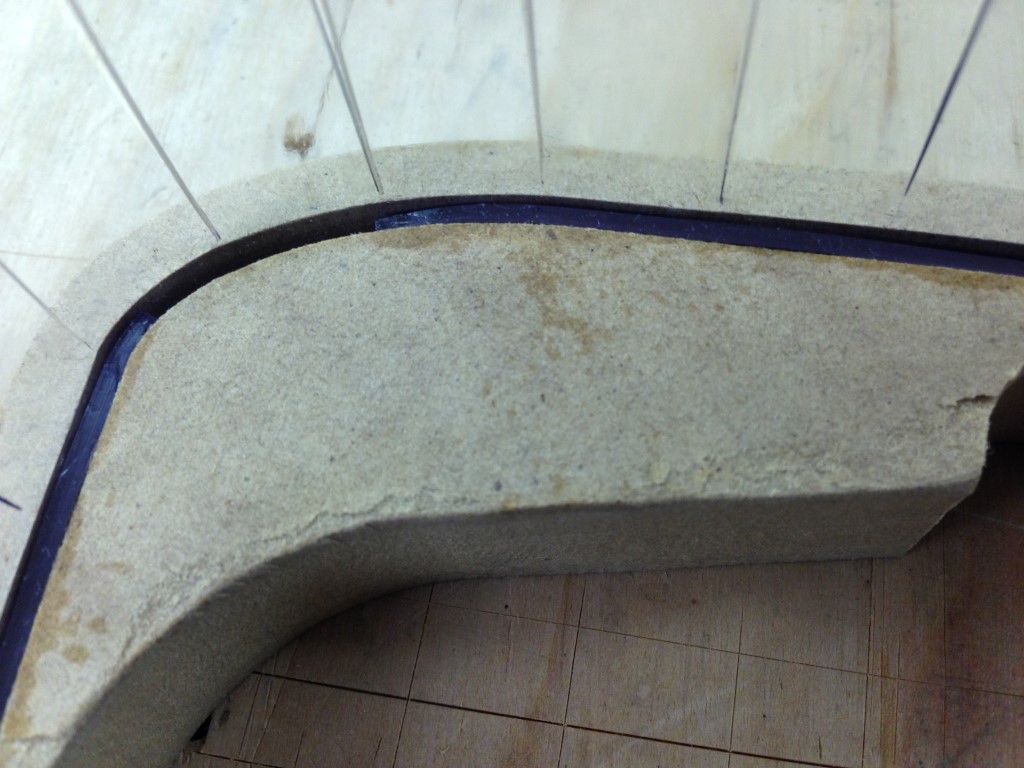
The magnets I used are the rare earth magnets from China, they are strong and inexpensive.In ver1 of the dust boot I didn’t include locator pins but notice in ver2 I did. I added locator pins because sometime there is just too much tension on the boot and I noticed it tended to slide and even came loos once when milling.
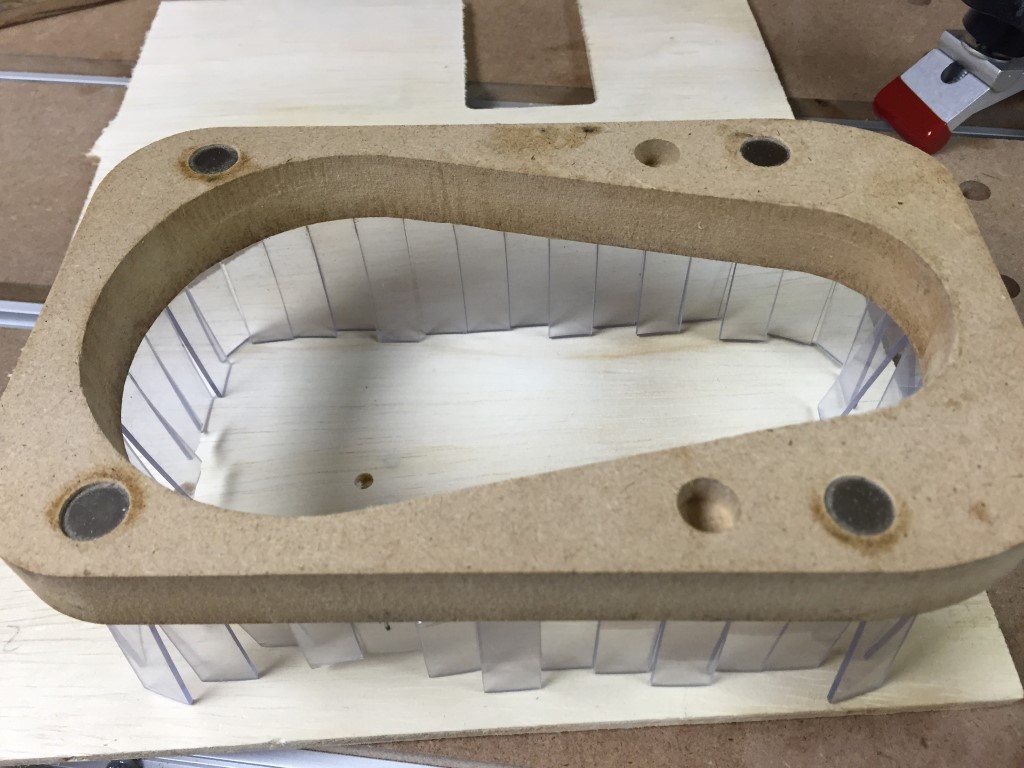
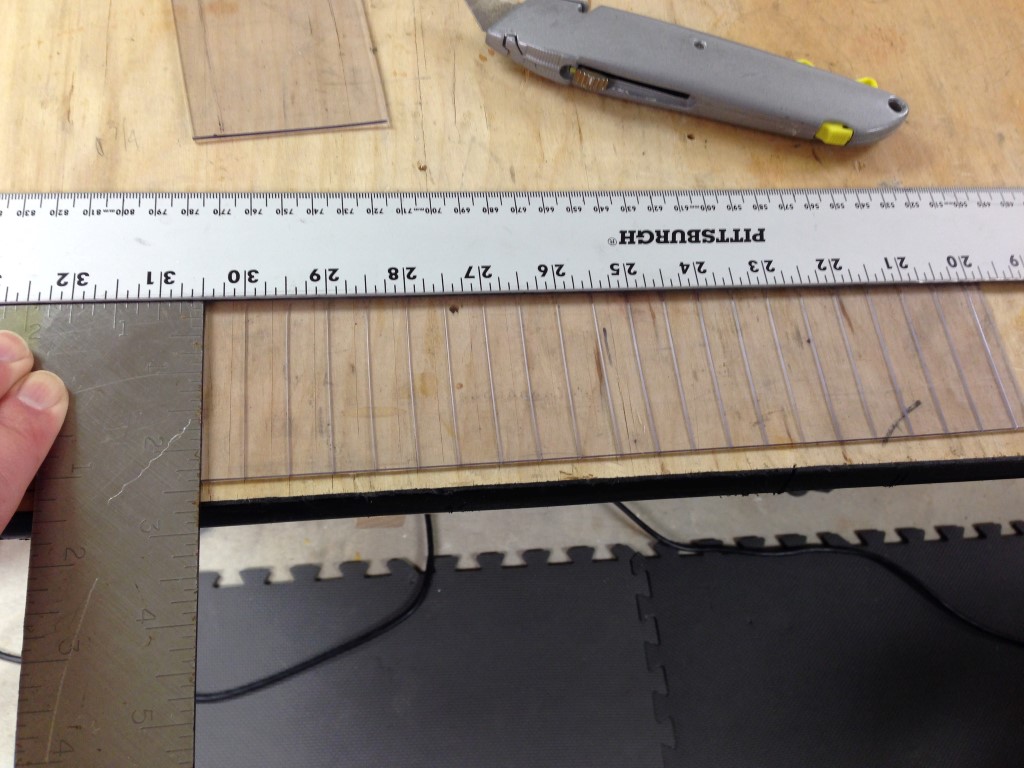
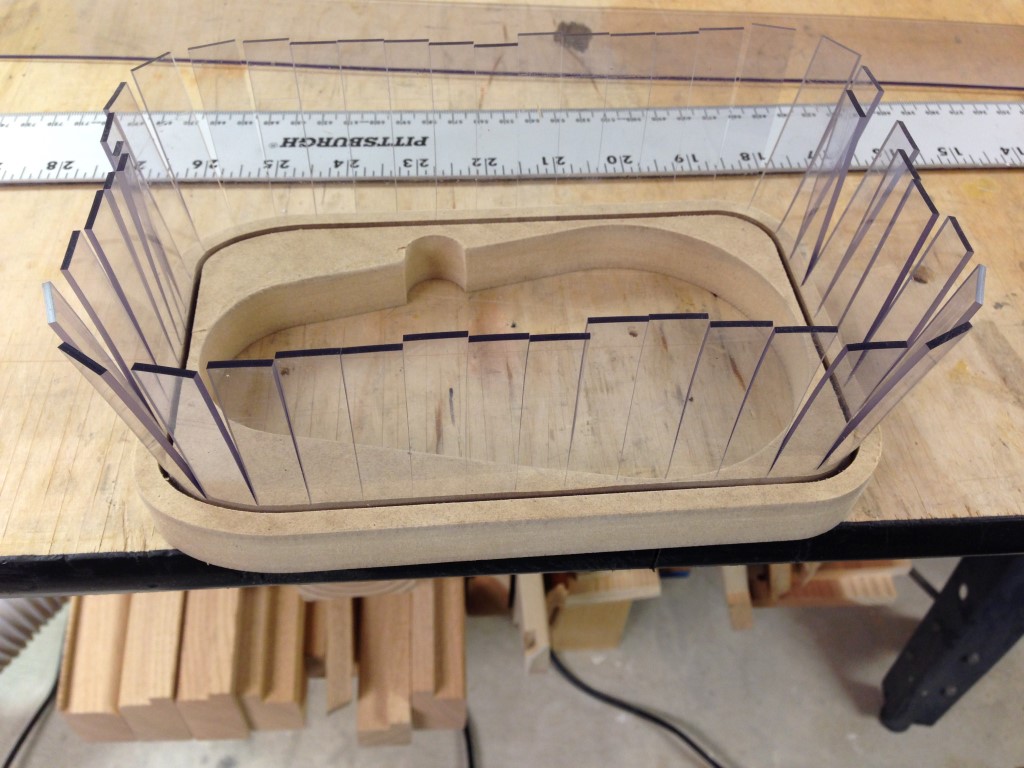
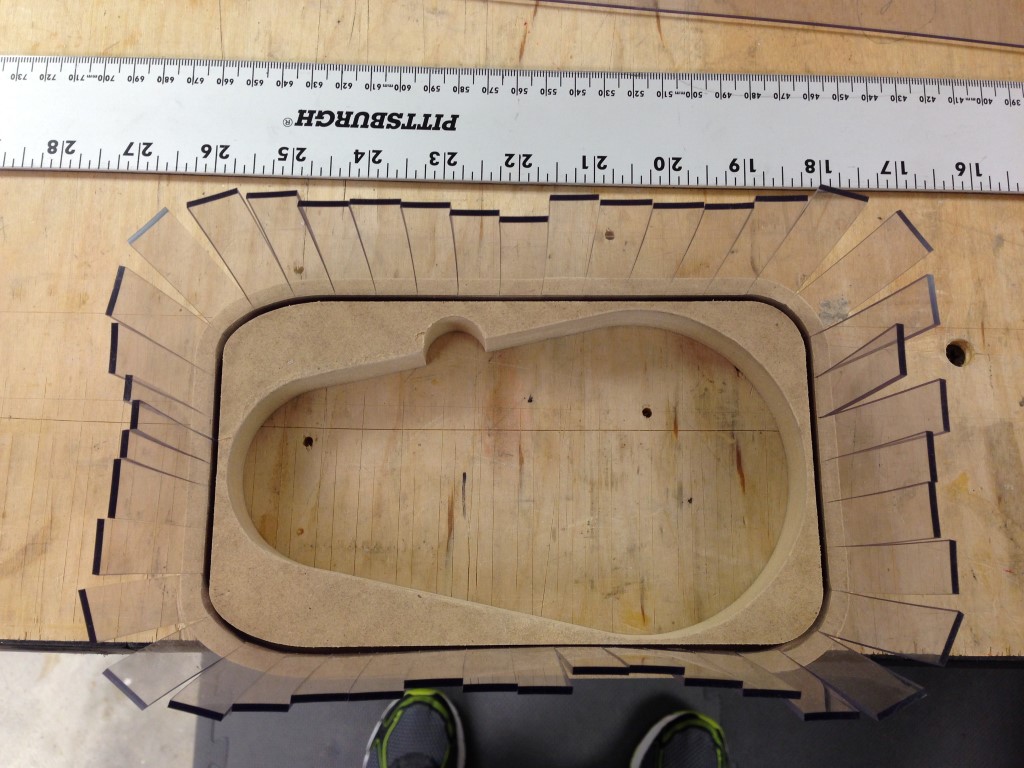
For the skirt I decided to use clear vinyl which I picked up locally, its actually used for freezer doors and comes in rolls.
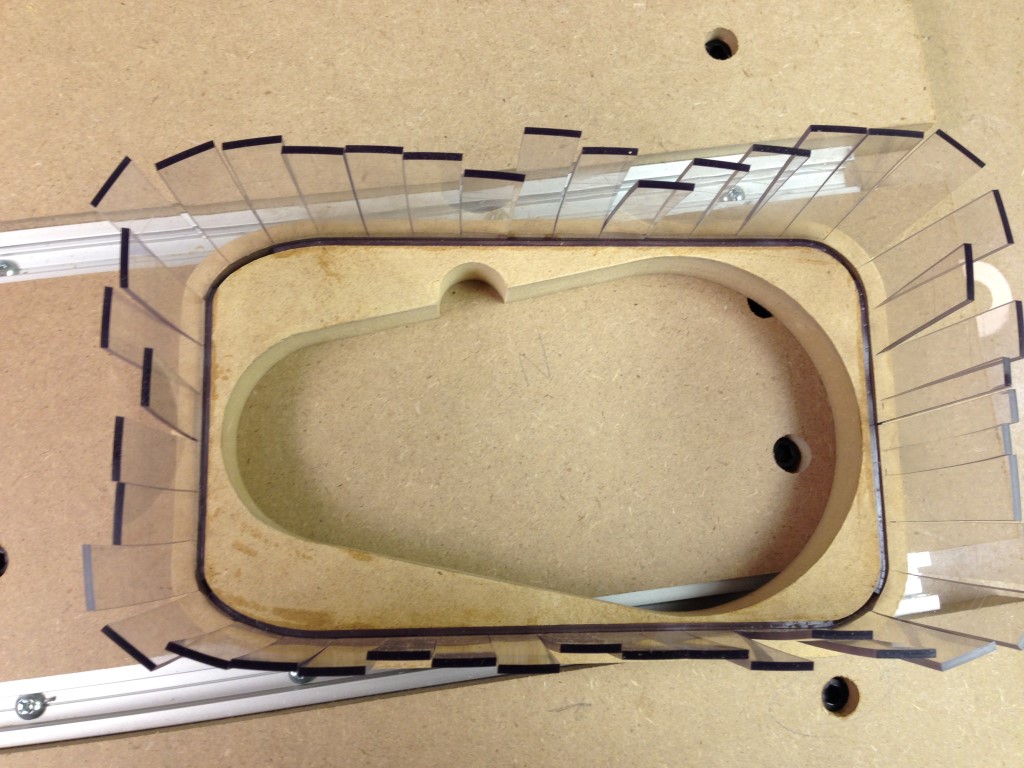
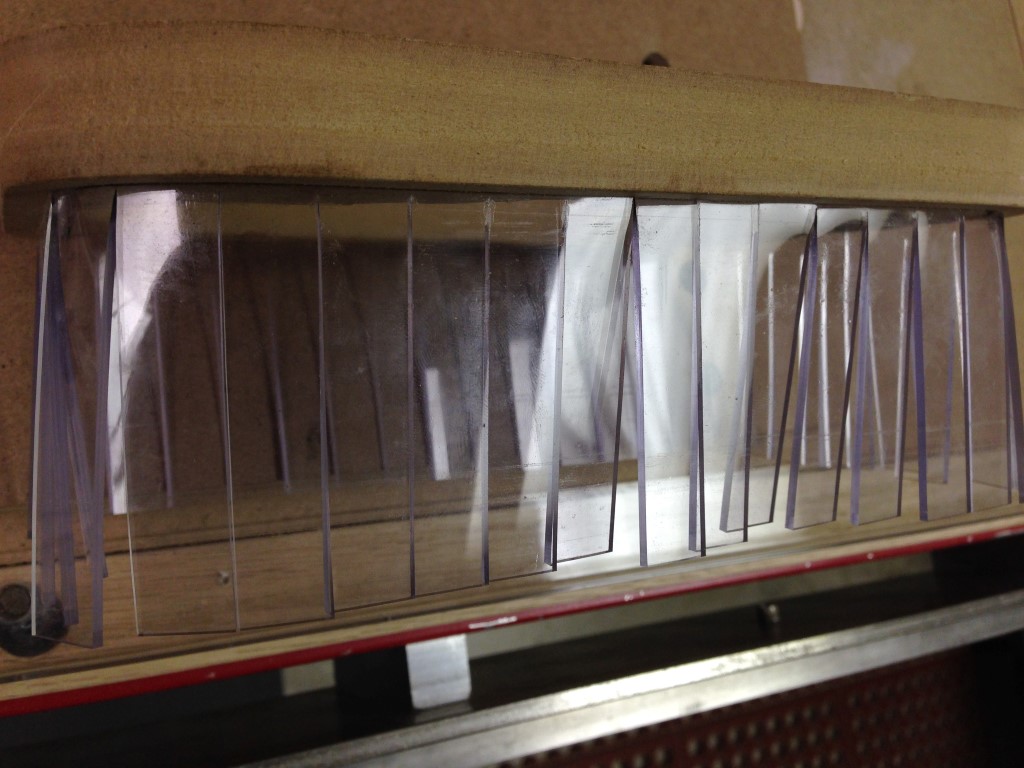
I cut the skirt to width and then cut fingers in it.

I cut some small thin strips of the vinyl for wedging the skirt into the boot.

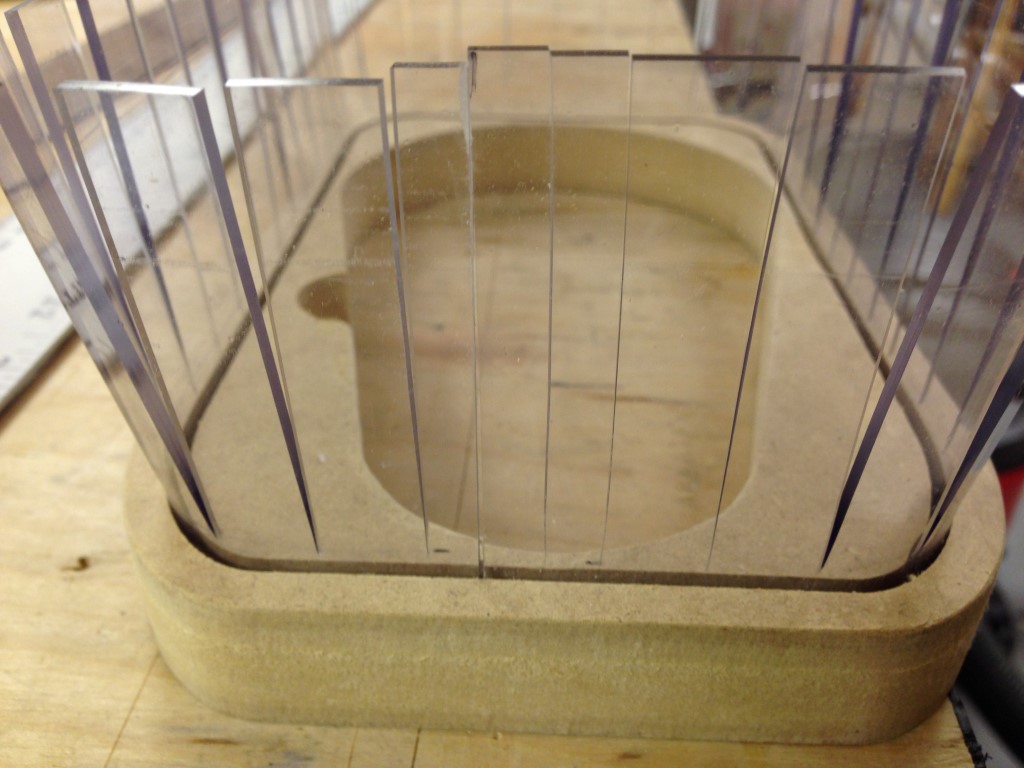
and here is a finished product
If I was able to help you figure out and fix your problem, buy me a beer! and Thanks..
![]()