

Install OpenVPN and install the application, selecting all options.

Open an Administrator command prompt and go to the directory:
“C:\Program Files\OpenVPN\easy-rsa” on a Windows 64 bit box
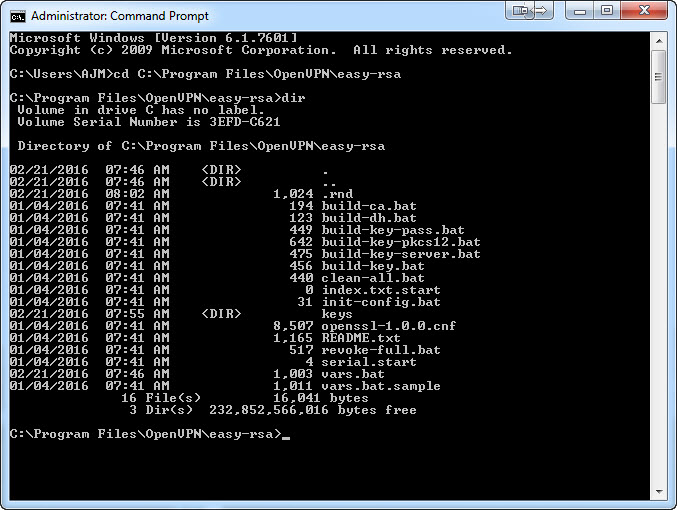
Run batch file init-config.bat. This will copy a single file vars.bat
![]()
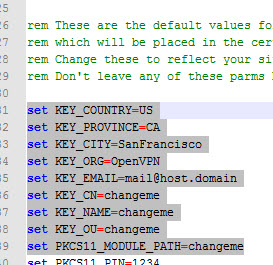
Edit the file vars.bat modifying the following items, specifically Key_Size, Country, Providence, City
BEFORE:
AFTER:
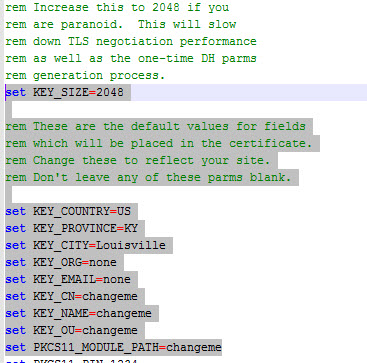
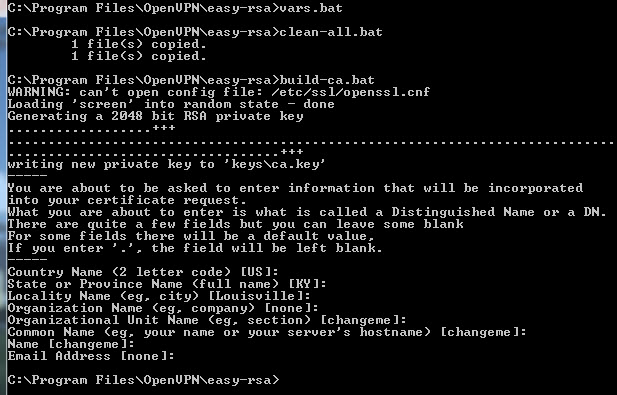
Then run the following in order (Run vars.bat, Run clean-all.bat, Run build-ca.bat) accepting the defaults when the build-ca.bat runs
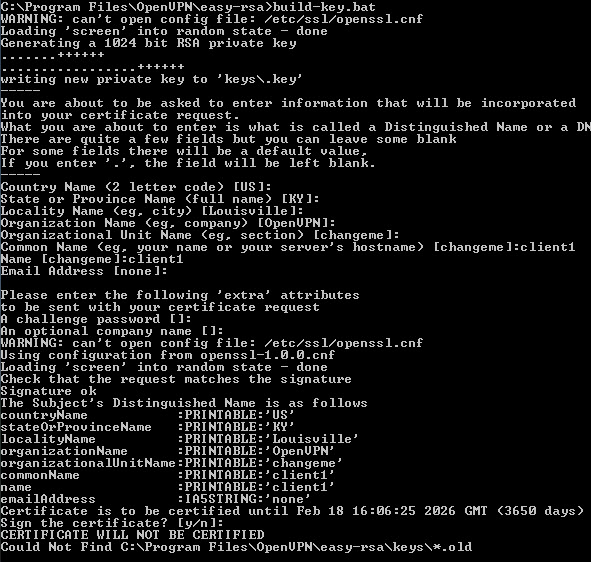
Run batch file build-key.bat (this builds the client key)
![]()
It’s important to note the CNAME, I was confused by this at first but suffice to say they must be unique to the Key that is being generated. In my case I called the key “client1” so the CNAME and Name must match that name when running the batch file. By default when the batch runs it will use the CNAME used in vars.bat “changeme”, just remember to change it to something unique.
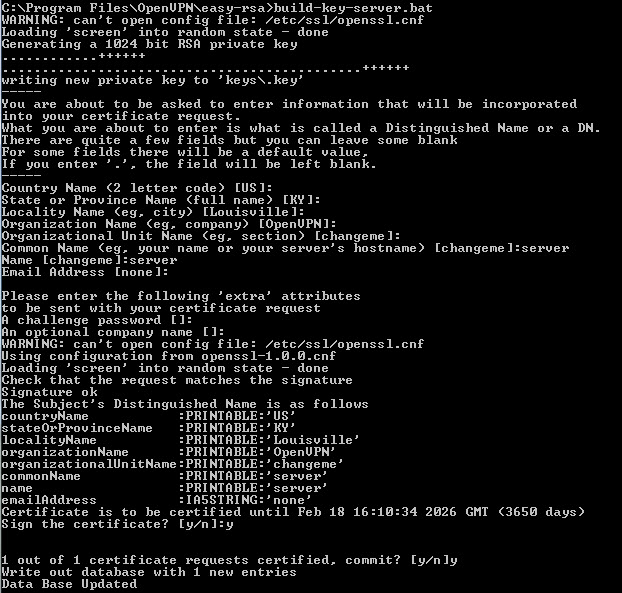
Run build-key-server.bat
![]()
This is similar to the client key in regard to the CNAME and Name. In this case I used the name “server” for the name
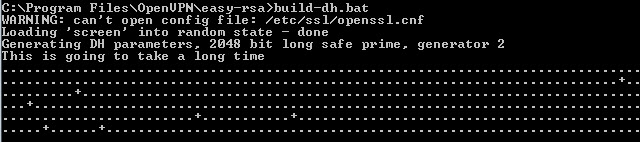
Run build-dh.bat. It takes a couple of minutes to finish.
When complete the folder “C:\Program Files\OpenVPN\easy-rsa \easy-rsa\keys” will look similar to this.

If you made a mistake I would start over from scratch as OpenVPN is a bit fussy when going back a step or 2 to try and fix something.
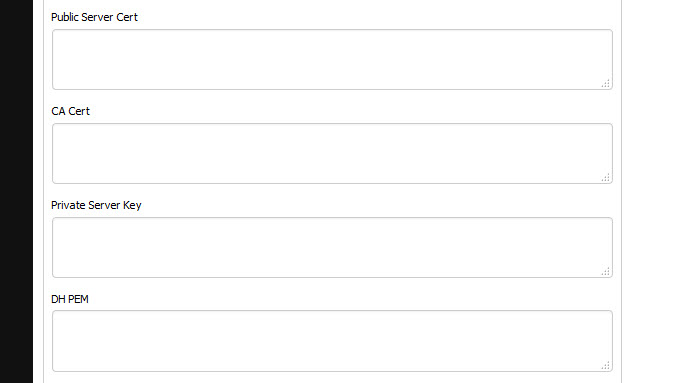
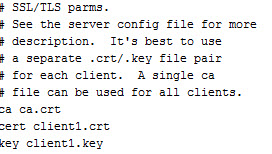
So the following files need to be copied to DD-WRT:
- crt into CA Cert box
- crt into Public Server Cert box
- key into Private Server Key box
- pem into DH PEM box
Only copy from the “—–BEGIN CERTIFICATE—–” to the “—–END CERTIFICATE—–” sections of the certificates into the boxes
Next we need to add some information into the “Additional Config” section on the router that relates to DNS, DHCP, Routes and the location of the certificates on the DD-WRT server. The unique item here is the DNS server that is being used, OpenVPN won’t work without one, I’m using Google’s.
push “route 192.168.1.0 255.255.255.0”
push “dhcp-option DNS 8.8.8.8”
***These may not be needed but can be included if they are***
server 10.1.1.0 255.255.255.0
dev tun0
proto tcp
keepalive 10 120
dh /tmp/openvpn/dh.pem
ca /tmp/openvpn/ca.crt
cert /tmp/openvpn/cert.pem
key /tmp/openvpn/key.pem
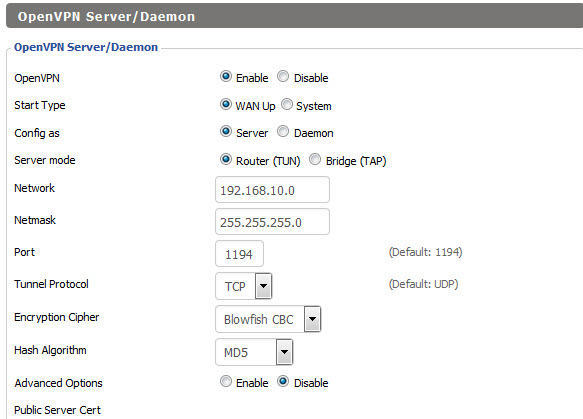
I had to make some changes to the default VPN Services page for my setup. In my case, I changed the Tunnel Protocol to use TCP instead of UDP as well as the Hash Algorithm to SHA1 instead of MDA5.
We also need to make a change to the firewall to allow the VPN connection to make the connection to the router. On the Administration/Commands tab insert the following into the Commands section and then click “Run Commands” followed by “Save Firewall”.
iptables -t nat -A POSTROUTING -s 10.1.1.0/24 -j MASQUERADE
***Optional***
iptables -I FORWARD -i br0 -o tun0 -j ACCEPT
iptables -I FORWARD -i tun0 -o br0 -j ACCEPT
iptables -I INPUT 1 -p udp –dport 1194 -j ACCEPT
iptables -I FORWARD 1 –source 10.1.1.0/24 -j ACCEPT
Copy the client1 keys to the client machine and place them into the folder “C:\Program Files\OpenVPN\config\”also copy the file client.ovpn from “C:\Program Files\OpenVPN\sample-config” and place it in the folder along with the client1 keys. The folder should look like this when complete.

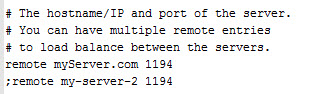
The last piece of the puzzle is to modify the client.ovpn file for our specific settings. Open the file in a text editor and modify the following at a minimum. The hostname/IP should be changed to your server and the file names of the keys should also be changed.
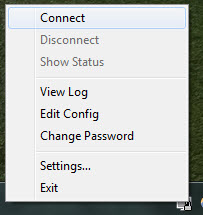
Once those items are complete you should be able to use the VPN connection. Start the OpenVPN application on the client and left click on the tray icon then click “Connect”
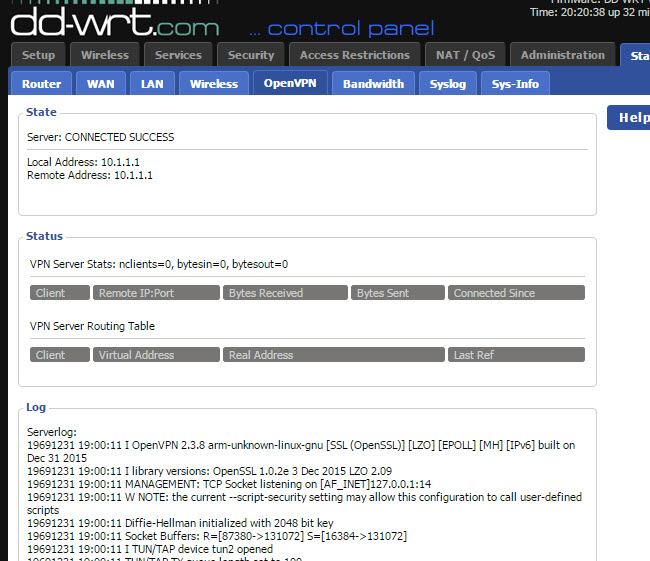
If successfully you will see the following.
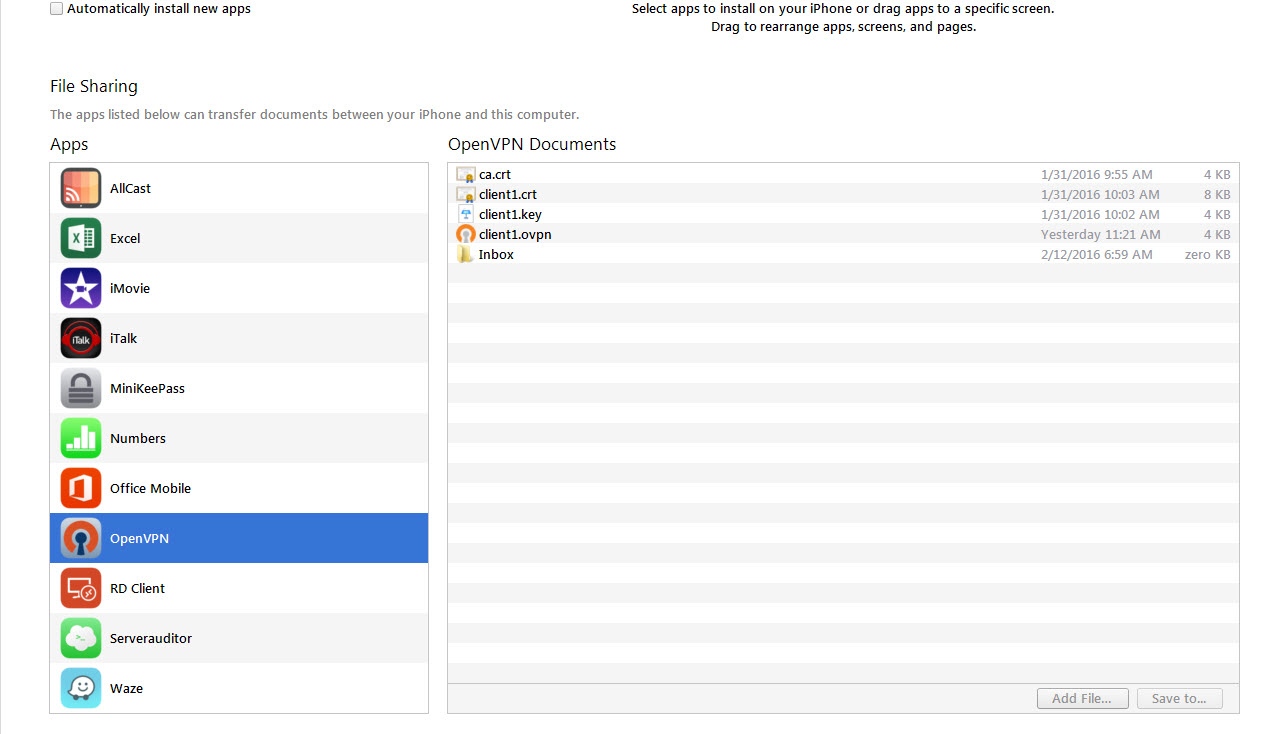
To create the connection on an IOS device, install the OpenVPN application from iTunes. Copy the keys and from your desktop, the easiest way to copy the files is to sync the device. Plug in the device, go to the “Apps” section and click on the OpenVPN on the left then on the right drag and drop the following files (ca.cert,client1.crt, client1.key, client1.ovpn)
If you are experiencing issues with connectivity be sure to read the logs on both the server and client. The server side log is on the Status page on DD-WRT .
The client log can be seen by left clicking on the icon on the taskbar.

If I was able to help you figure out and fix your problem, buy me a beer! and Thanks..
![]()