

I woke the other day to my LCD not turning on and just making a “clicking” sound when trying to power it on. After a quick search on the internet it appears Samsung has confirmed this to be a problem and was willing to do the repairs for free except the offer has expired (posted from CNET).
Samsung’s initial statement to CNET (February 13):
A small percentage of certain models of Samsung televisions have experienced performance issues caused by a component called a capacitor. We are unable to provide specifics on the actual number but can say that it is a small number given the volume of Samsung TVs in the US.
Since originally confirming this issue in early 2010, Samsung has voluntarily provided free repairs for U.S. customers with affected televisions. Customers who believe they have an affected TV should call 1-800-SAMSUNG to speak with a customer service representative.
The Oklahoma settlement reaffirms that Samsung’s efforts to voluntarily repair affected products for consumers since early 2010, have been appropriate for the situation. The settlement will be final on February 20, 2012, at which time we will make a nationwide announcement to explain next steps to customers. Once the settlement is approved, a process will also be put into place to compensate consumers who have already paid for a repair.
The models affected by the settlement are 2006-8 TVs, listed below. The asterisks represent the size and series of the TVs.
LCD TVs: LNT******/XAA; LN**A******XZA; LNS4041DX/XAA; LNS4051DX/XAA; LNS4052DX/XAA; LNS5296DX/XAA
Plasma TVs: HPT5034X/XAA; HPT5044X/XAA; HPT5054X/XAA; HPT5064X/XAA; PN42A410C1DXZA; PN42A450P1DXZA; PN50A410C1DXZA; PN50A450P1DXZA; PN50A460S4DXZA
DLP TVs: HLT5087SAX/XAA; HLT5087SX/XAA; HLT5089SAX/XAA; HLT5089SX/XAA; HLT5687SAX/XAA; HLT5687SX/XAA; HLT5689SAX/XAA; HLT5689SX/XAA; HLT6187SAX/XAA; HLT6187SX/XAA; HLT6189SAX/XAA; HLT6189SX/XAASamsung’s follow-up statement to CNET (February 15):
“The 7.5 million TV sets mentioned by Samsung’s attorney in court was in reference to the size of the total class of consumers who will receive the benefit of an extended warranty on the capacitors at issue in this case; specifically, it includes all of those models included in your current article.
The number of class members included in the settlement has no bearing on the potential number of TVs that may be affected by the faulty capacitor.
Based on the most current data available, we can confirm that only a small percentage-approximately 1%- of all TVs sold in the US during those three years could exhibit the faulty-capacitor problem.”
Although the problem affects a relatively small percentage of TVs, Samsung has decided to extend the warranty for 18 months on this part in more than 7.5 million customers’ TVs in order to ensure that any customer who has the problem will continue to receive a free-of-charge repair.
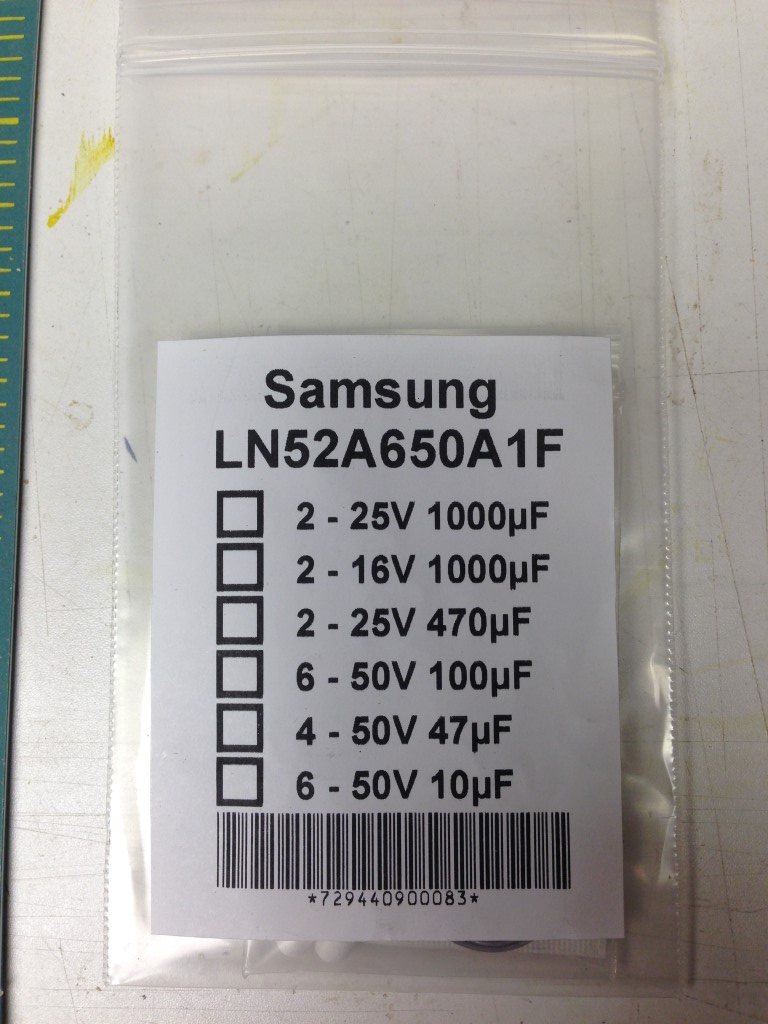
So, the more I dug around the more it seems to be a capacitor replacement issue which is a snap to do… I acquired a kit from the internet for my TV for $20, I could probably have purchased the items individually for cheaper but someone had already done the work of combining the caps needed in a kit, home run!
I’ll walk you through how I completed this project. You should be aware that this is an electronic piece of equipment and you should be cautious! I take no responsibility for any damage or injury that results from you performing repairs.
1) Buy kit matching your TV model number or assemble your own capacitors for the job.
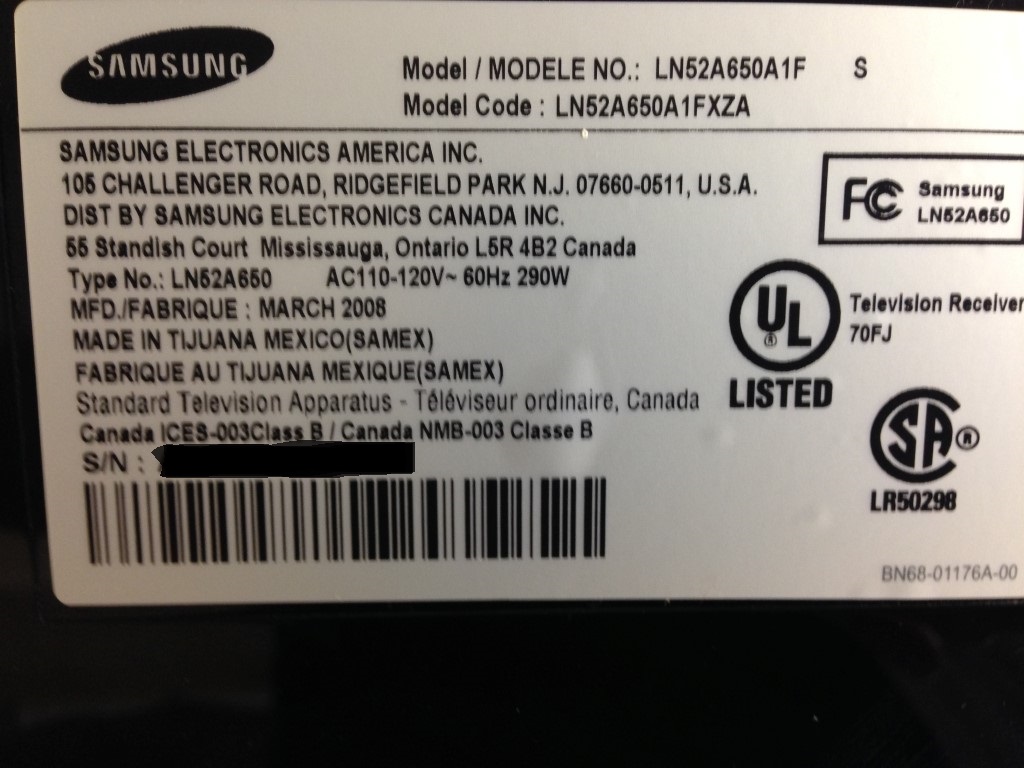
2) Remove the back panel from your TV, I didn’t take any progress pictures of this process but its simply removing the screws that hold the cover on, they are all the same size so there should be no issues in getting them mixed up but you can always be organized and lay them about in an orderly fashion.

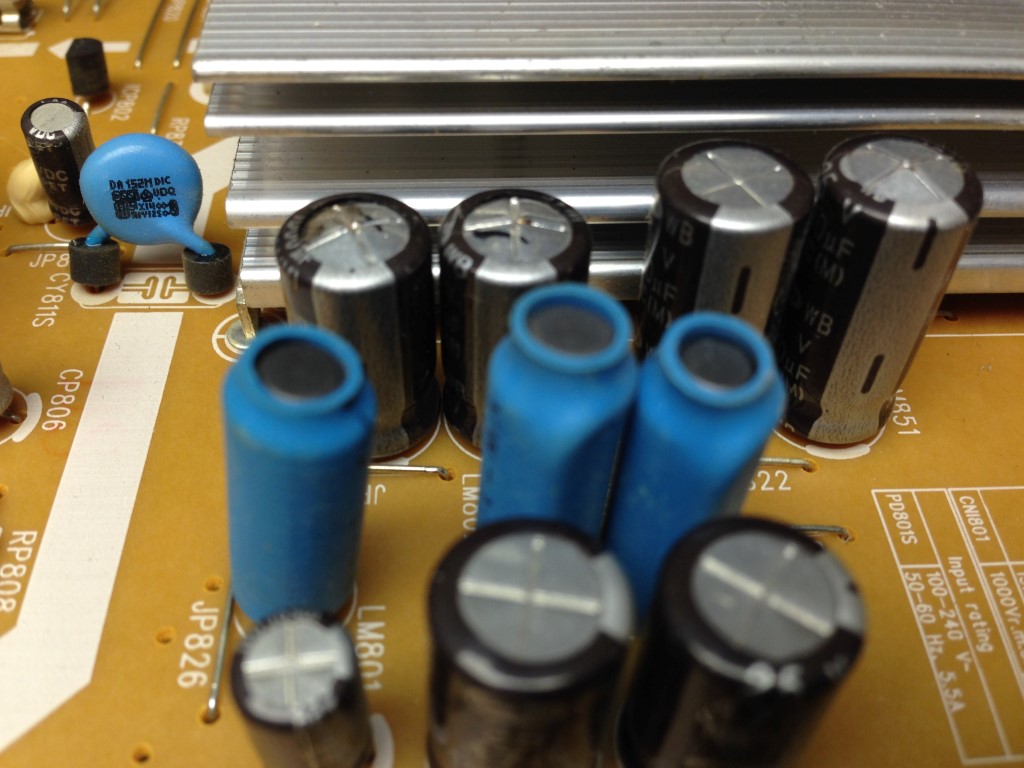
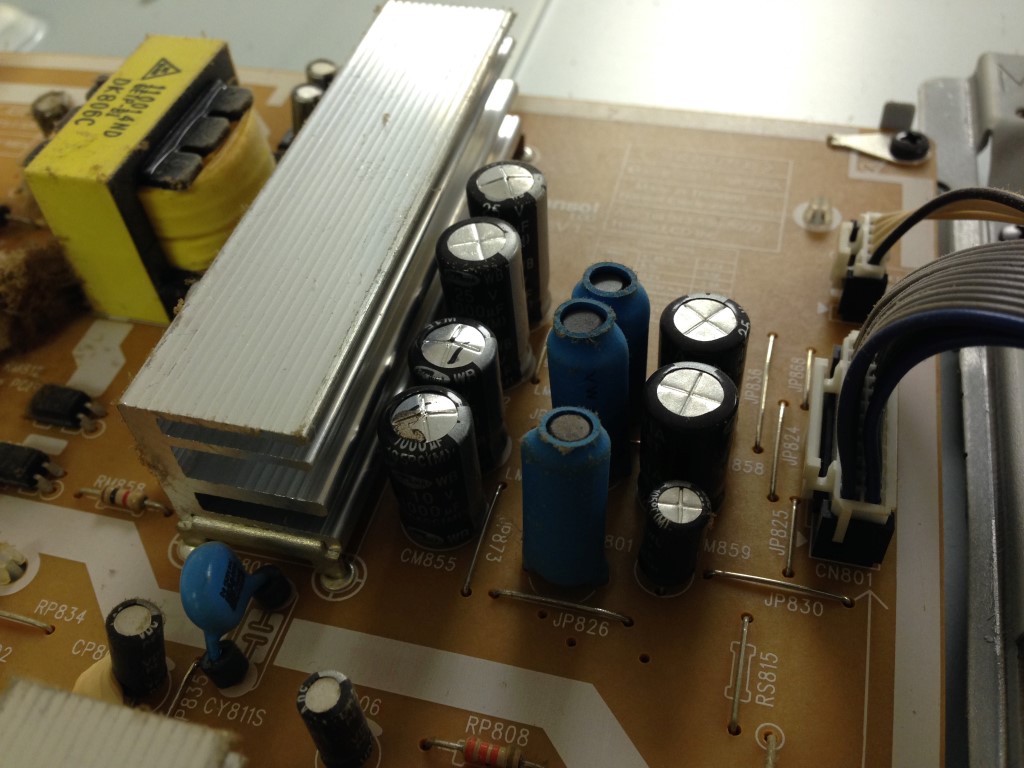
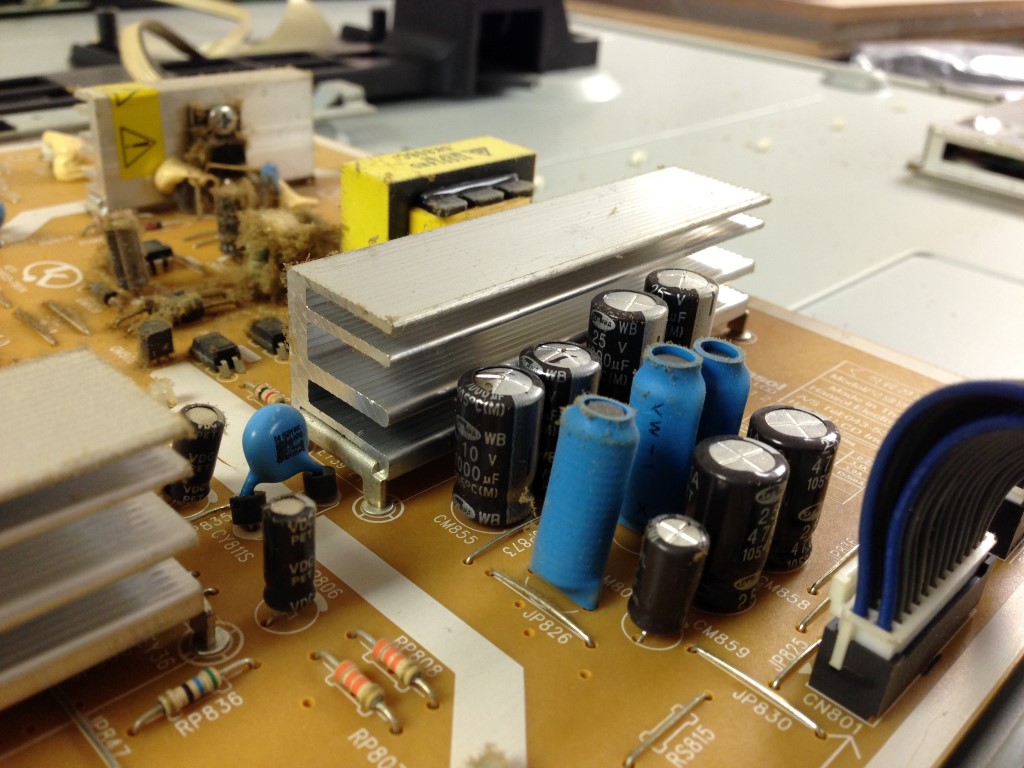
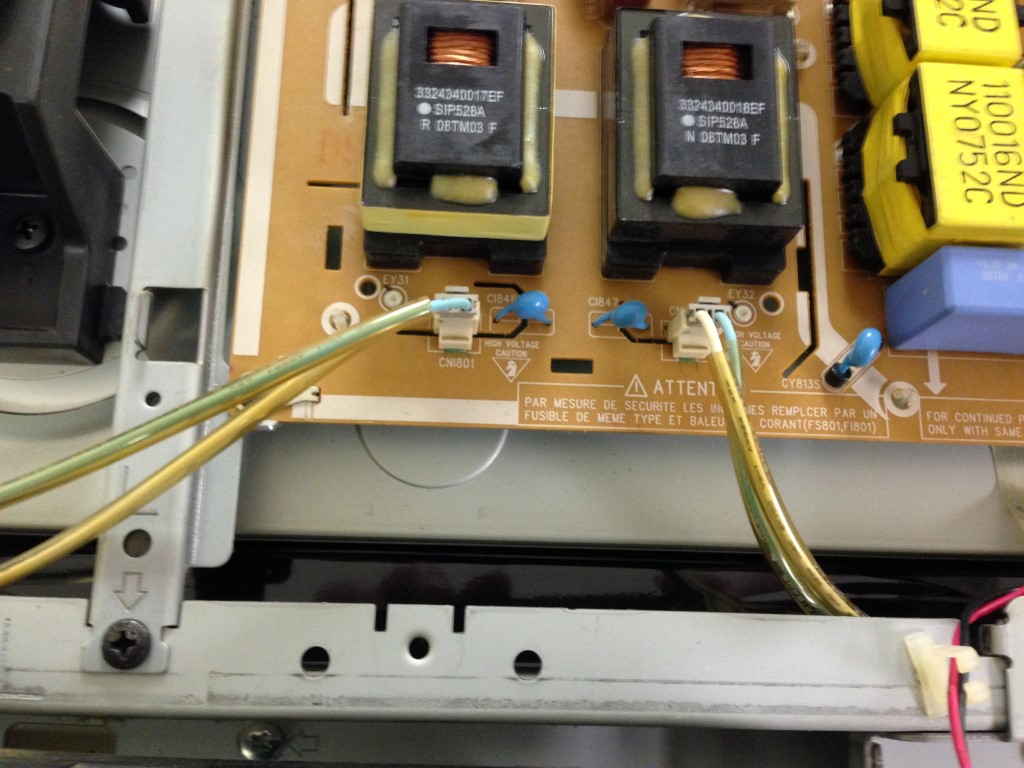
3) My understanding is that LCD’s do not store electricity like old TV’s so the risk of shock is reduced. For piece of mind first I went ahead and grounded a wire to the chassis ground and then grounded the 2 larger caps (center of image) on the power supply board to make sure they were discharged

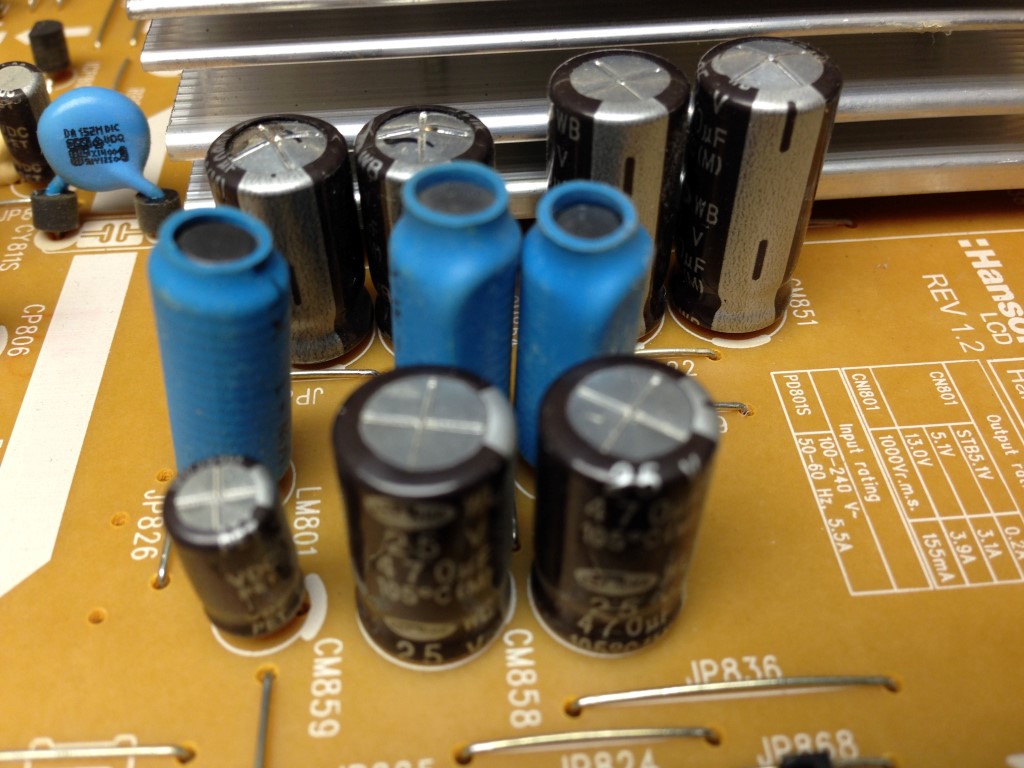
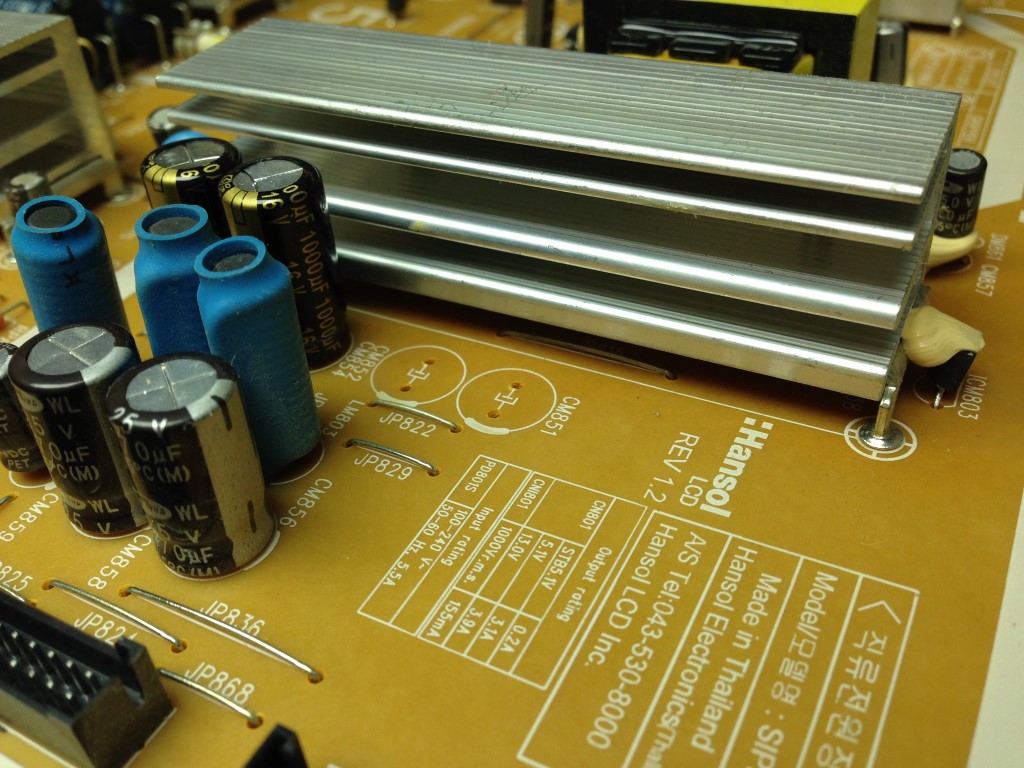
4) You can now see the bad capacitors on the PS board as they have a rounded top… BINGO! we have our culprits.
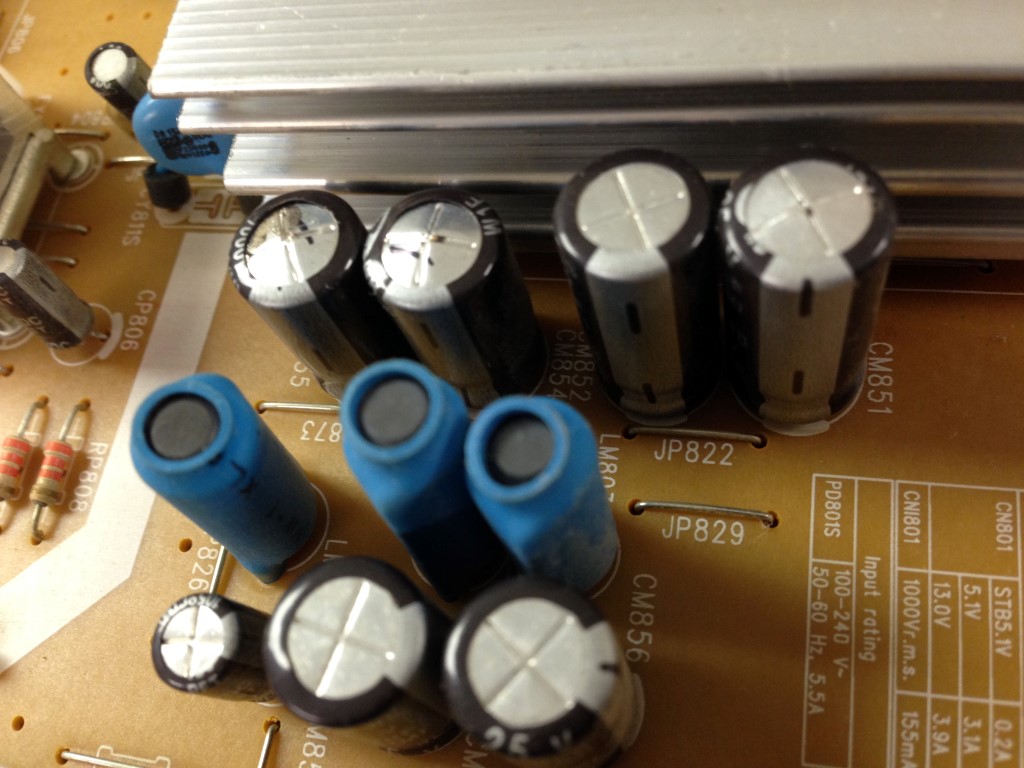

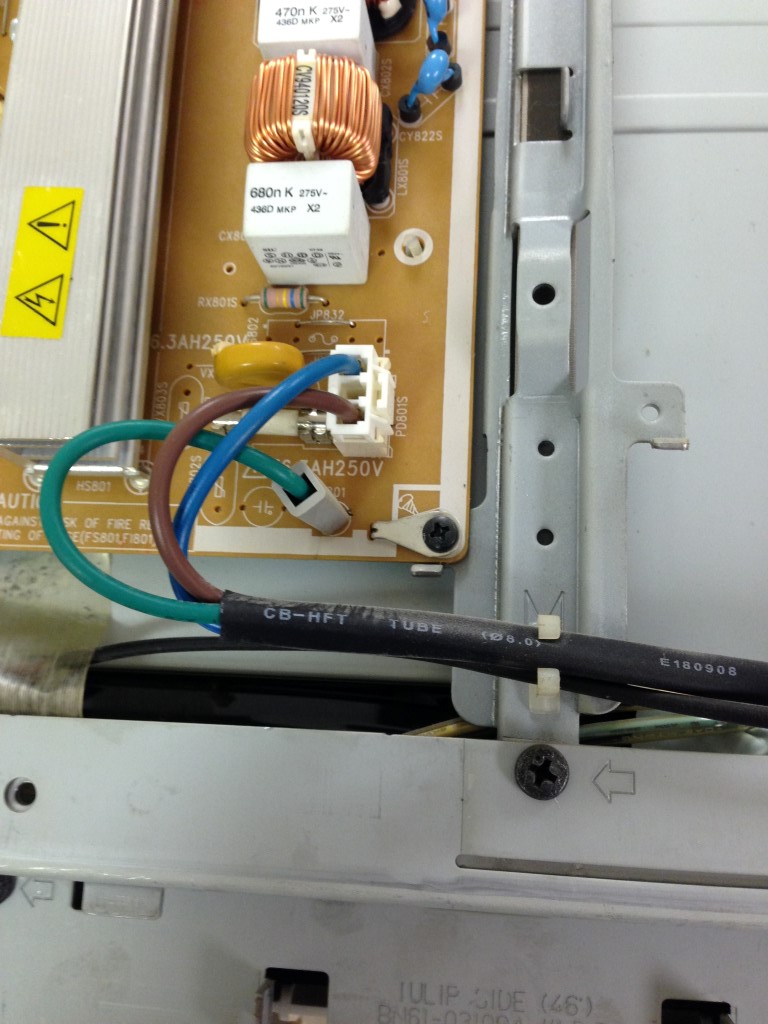
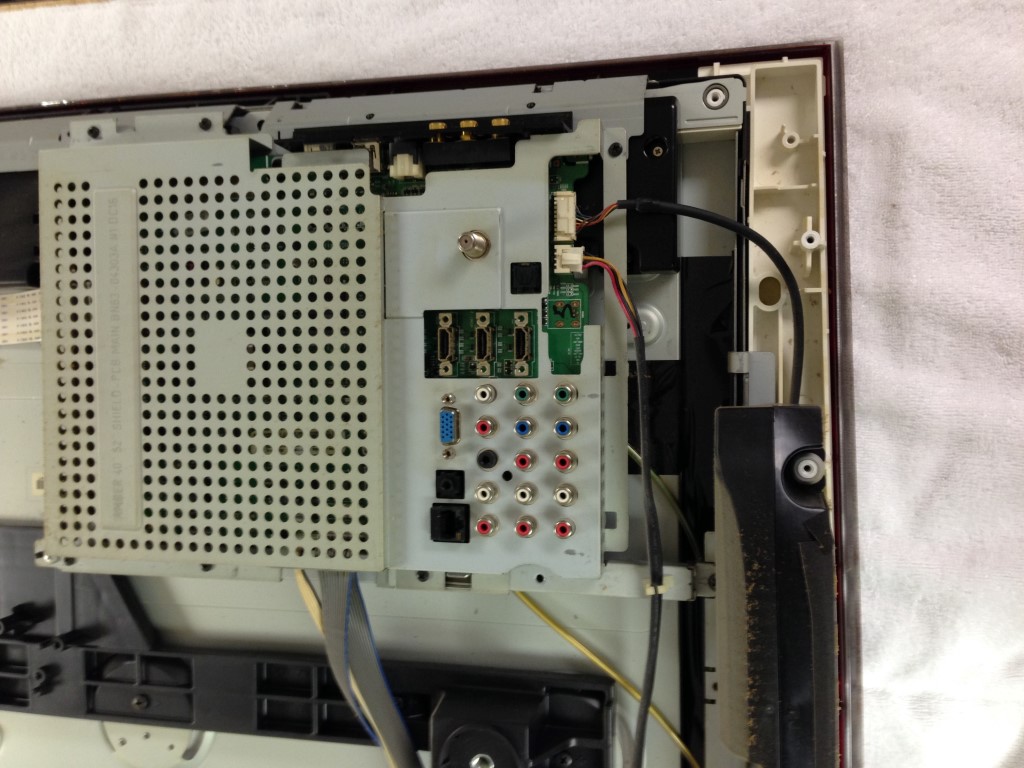
5) Remove the connectors and the 4 screws that hold the PS board to the frame.

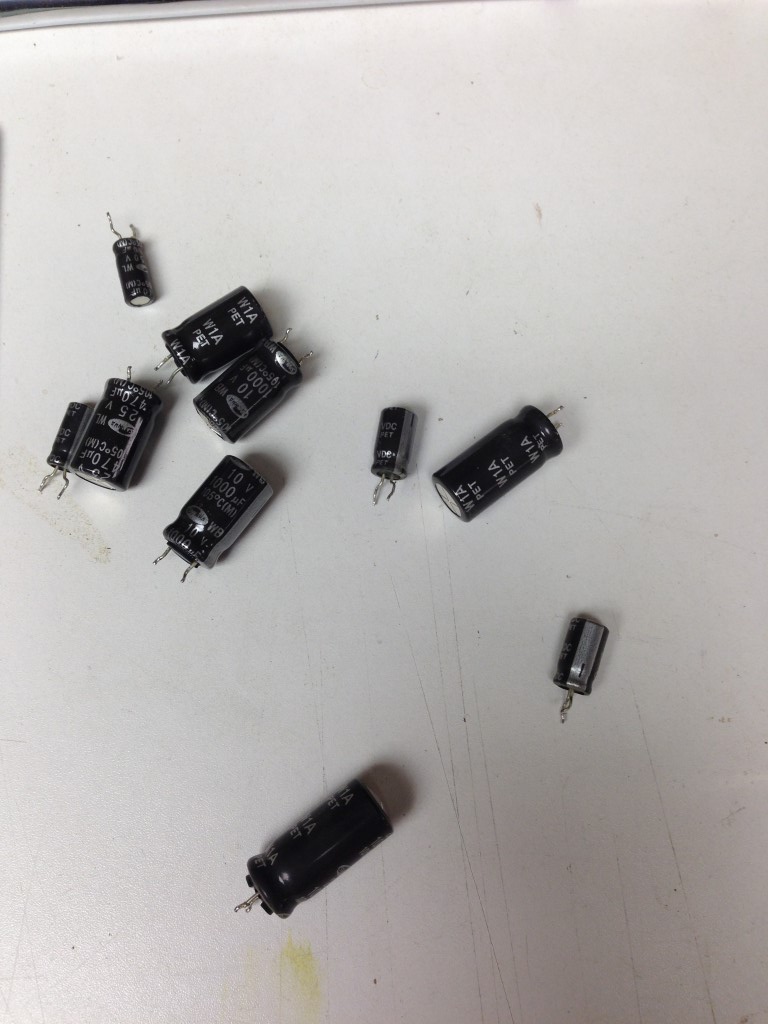
6) Remove the old capacitors and solder in the new ones. Replace 1 at a time unless your experienced. The kit I bought came with 22 capacitors, I only replaced a handful, the main ones being those that were bulging (25v 1000uf and 16v 1000uf). This is where a de-soldering iron comes in handy.. Solder in your new capacitors, remember to match the negative to the negative side.
![IMG_1792[1]](https://webajm.com/wp-content/uploads/2015/01/IMG_17921.jpg)
7) For good measure I used some compressed air and blew out the CPU portion of the TV before replacing the back.
8) Replace back cover, and plug it in and try to power it up… I hope it worked for you as it did for me.
If I was able to help you figure out and fix your problem, buy me a beer! and Thanks..
![]()
On The back side the screen (52″) the film has bubbled up, looks like branches or thorn bush.
Is there a way to smooth this out.
This is the only thing wrong it
I’m not familiar with the issue that you’re having, sorry I can’t help.